How to develop, push, build, deploy (to Docker Hub) and run docker image-based container in Azure DevOps.
This article assume that you already are familiar with docker, although it doesn’t focus on Docker we will touch some basics.
 Containerization in real life
The key advantage of Docker is that it allows users to pack the application with all its dependencies into a standardized module for development. Unlike virtual machines, containers do not create such an additional load, so you can use the system and resources more efficiently with them.
Why use container?
Docker’s takeoff was truly epic. Even though the containers themselves are not a new technology, before Docker they were not so common and popular. Docker changed the situation by providing a standard API that greatly simplified the creation and use of containers and allowed the community to work together on libraries for working with containers.
Build dummy image
Suppose you have a Dockerfile file that describes your application, if not, let’s create dummy one.
For demo, i will use nginx image, should be able to see “hello” in /humans.txt URL
Don’t create manually this Dockerfile, in next statement we will create it automatically.
# Dockerfile
FROM nginx:alpine
COPY humans.txt /usr/share/nginx/html/humans.txt
To get started, open PowerShell, copy next line, paste, and press enter.
It will create a directory ./demo and inside, two files, first humans.txt with hello word inside, and Dockerfile with content above.
mkdir ./demo; cd ./demo; echo 'hello' > ./humans.txt; echo "FROM nginx:alpine`nCOPY humans.txt /usr/share/nginx/html/humans.txt" > ./Dockerfile
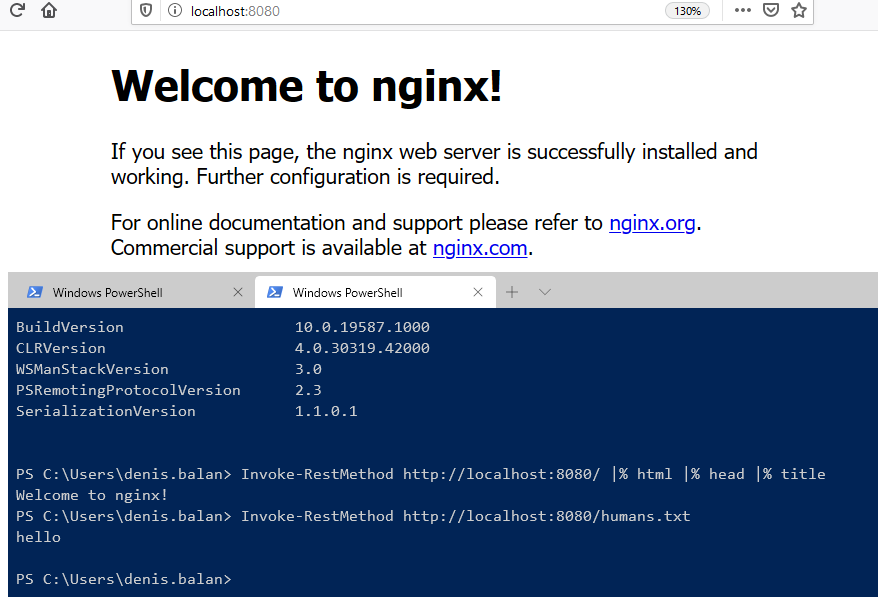
To test it locally, let’s build it and run
# suppose you ran previous statement and Dockerfile is present
docker build . -t demo
docker run -p 8080:80 demo
# either open in browser
# http://localhost:8080/humans.txt
# or in powershell
Invoke-RestMethod http://localhost:8080/ |% html |% head |% title
Invoke-RestMethod http://localhost:8080/humans.txt
Push Dockerfile
Continue with powershell opened, commit and push to Azure DevOps repository.
git add .
git commit -m "Add Dockerfile"
# assuming origin points to azure devops
git push -u origin --all
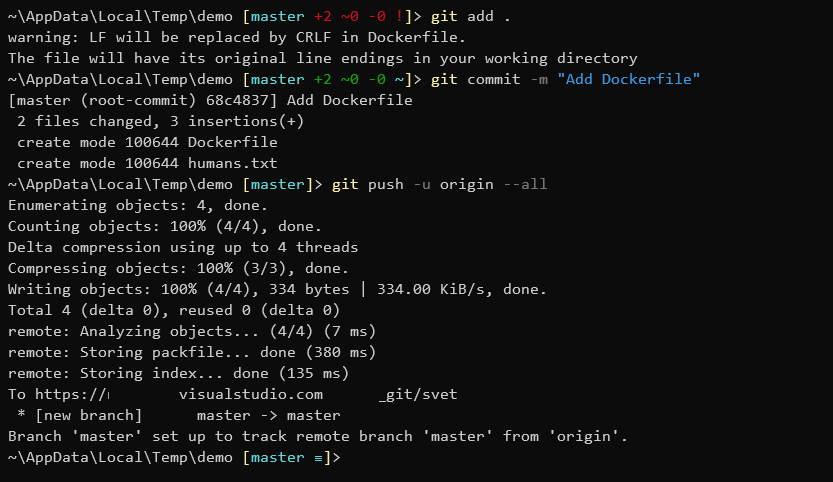
colored master word from prompt provided by posh-git for powershell
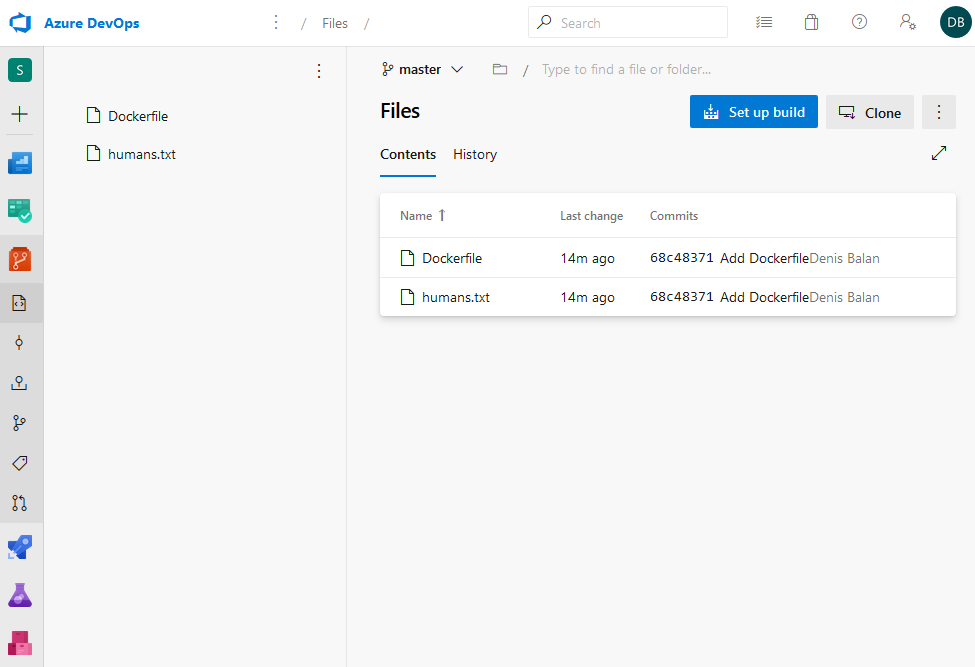
If no errors appeared while pushing, you should be able to see this file structure.
Add Docker Hub service connection
To add connection to public Docker Hub repository, perform those steps:
- Click
project settings - Under pipeline configuration click
service connections -
Click
new service connectionon right side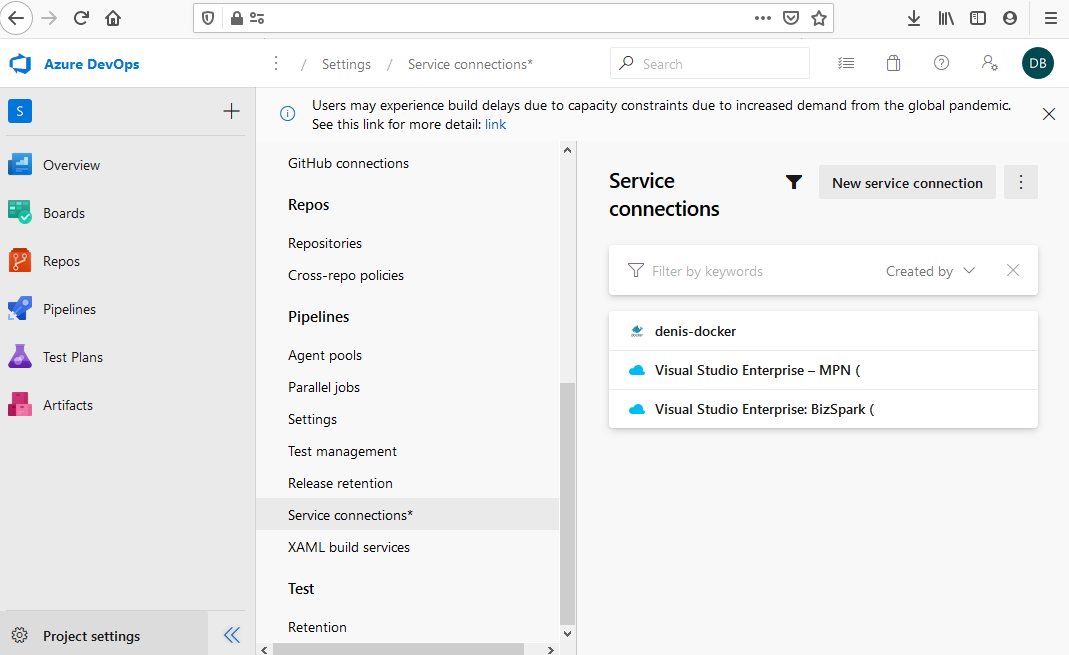
-
Specify parameters (your docker id and password)
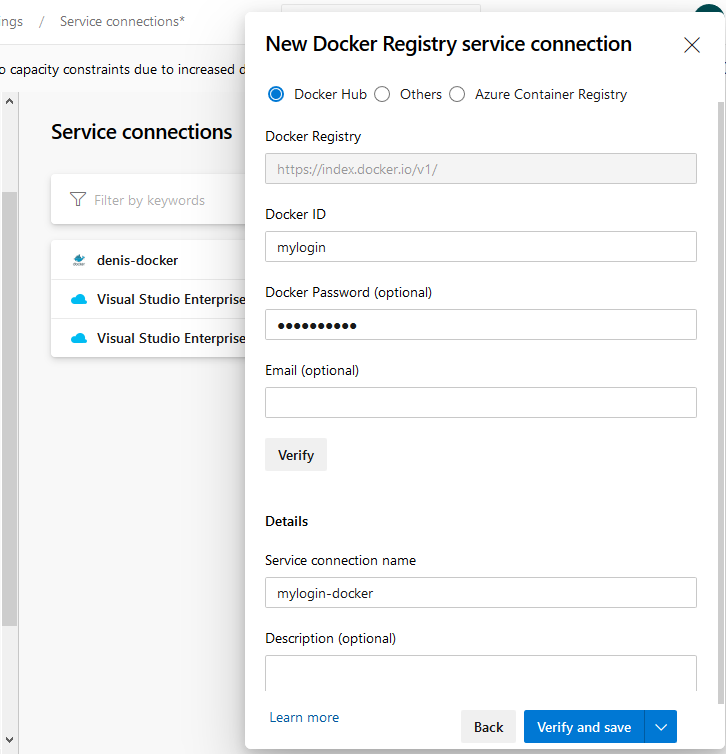
- Click save and verify
You are done.
Create YAML (.yml) pipeline file
You could achieve same steps just creating same file with your editor and pushing to repo.
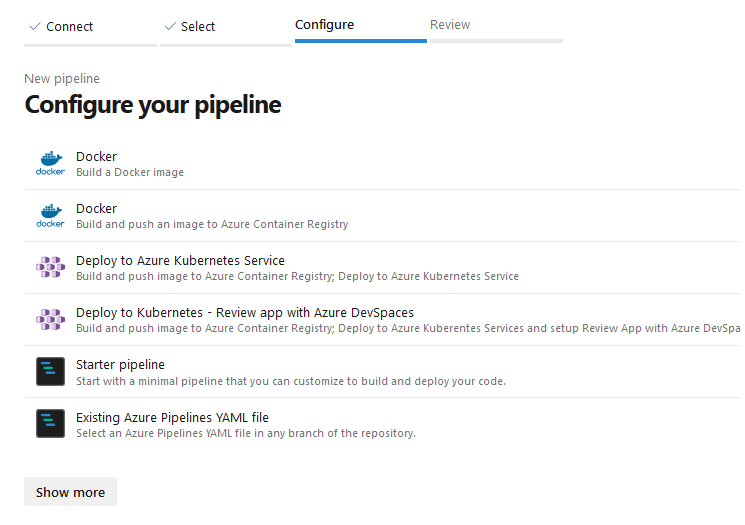
Now let’s go to Azure DevOps pipelines, click New pipeline, specify Azure Repos Git select your repository, and under configure step, select Starter pipeline like in image below, it should create a minimal azure-pipelines.yml file, but don’t worry, we will replace it with ours.
Paste this into .yml file.
# build and push image to hub.docker.com

trigger:
- master

resources:
- repo: self

variables:
  dockerHub: 'mylogin-docker' # specify your service connection name (create in previos step)
  imageName: 'mylogin/image-name' # your desired image name, format: mylogin/image-name
  tag: 'latest' # tag, target: mylogin/image-name:latest

stages:
- stage: Build
  displayName: Build image
  jobs:
  - job: Build
    displayName: Build
    pool:
      vmImage: 'ubuntu-latest'
    steps:
    - task: Docker@2
      inputs:
        containerRegistry: '$(dockerHub)'
        repository: '$(imageName)'
        command: 'build'
        Dockerfile: '**/Dockerfile'
        tags: |
          $(tag)
    - task: Docker@2
      displayName: Push image
      inputs:
        containerRegistry: '$(dockerHub)'
        repository: '$(imageName)'
        command: 'push'
        tags: |
          $(tag)
Now click Save and run
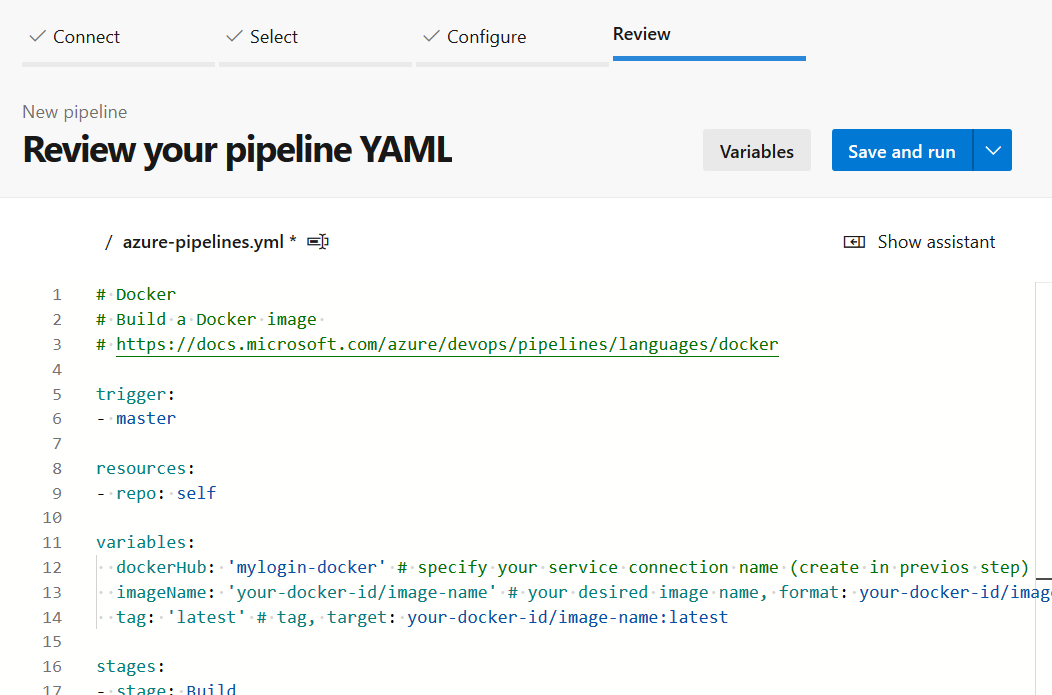
Wait until pipeline completes the execution, after that go to your Docker hub account, you should see your container image uploaded. Or, alternatively, search docker container images from command line
docker search mylogin
# sample output
# NAME                                   DESCRIPTION         STARS               OFFICIAL            AUTOMATED
# mylogin/image-name                                         0
Create release definition
After you successfully deployed container image into docker hub from azure devops, to run it you should create a release definition (or alternatively, deploy it via az cli specifying your image name), in this article i will go with first step.
Navigate to Pipelines - Releases click New release pipeline
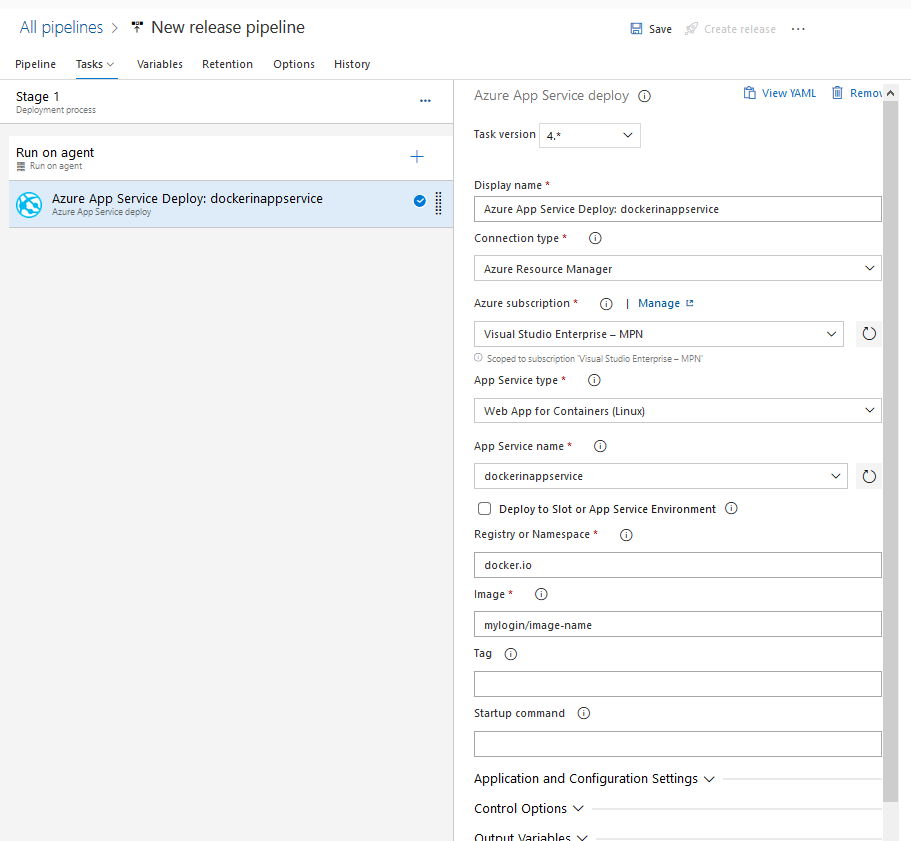
You can start with Empty job predefined template, after that navigate to tasks, under Run on agent click add button, select Azure App Service deploy and specify parameters:
- Your Subscription
- App Service type - Web App for Containers (Linux)
- App Service name (select or go to portal and create new container-provided app service)
- Registry or namespace - docker.io
- Image -
mylogin/image-namespecified in build step - Click Save and Create release
After all steps done, navigate to your app service in browser, appending /humans.txt at the end of the URL.

Comments